Smart Tiles Peel And Stick Backsplash
If you want to refresh your kitchen or bathroom, the backsplash is a natural place to start. It’s often the first thing people see when they walk in, and a new backsplash can transform the whole feel of the room. But traditional tile jobs can be expensive, messy, and time-consuming. That’s why peel and stick backsplash tiles are becoming so popular, especially Smart Tiles, which promise a simple, stylish upgrade without the hassle of grout or professional tools.
You may have seen Smart Tiles featured on home improvement shows or social media. They’re flexible, lightweight sheets with an adhesive back. Just peel off the liner and stick them onto your wall. No mixing, no waiting for mortar to dry, and no dust or debris. The appeal is obvious: you get the look of real tile in a fraction of the time, for a fraction of the cost. But are they really as easy as they look? And do they last?
In this guide, you’ll learn everything about Smart Tiles peel and stick backsplash—from how they work, to how to install them, to choosing the best style for your space. Whether you rent or own your home, you’ll find tips, warnings, and insights that go beyond the basics.
Let’s explore how these innovative tiles can help you redesign your space with confidence.
What Are Smart Tiles Peel And Stick Backsplash?
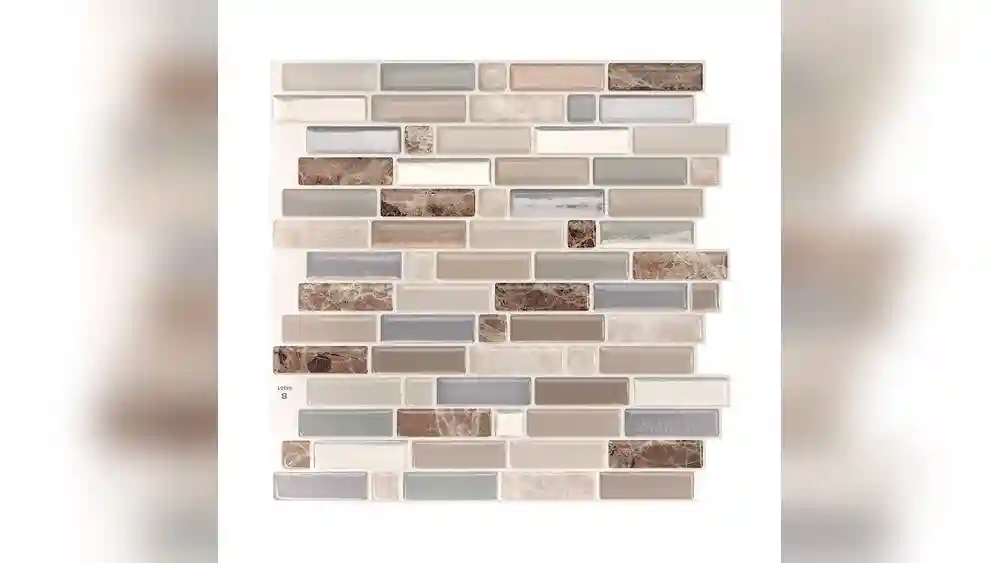
Smart Tiles are a unique type of self-adhesive wall tile. They are designed for quick and easy installation, allowing anyone to update their kitchen, bathroom, or laundry room. Each tile is made from a flexible, lightweight material called gel-o, which gives the tile a three-dimensional look—similar to real ceramic or glass tiles.
What makes Smart Tiles stand out is their peel-and-stick technology. The back of each tile is coated with a strong adhesive that sticks to most clean, flat surfaces. There is no need for glue, grout, or special tools. The tiles are also easy to cut with scissors or a utility knife, making it simple to fit around outlets or corners.
Smart Tiles are available in a wide range of colors, finishes, and patterns. You can find classic subway tiles, intricate mosaics, marble effects, and even metallic looks. They’re designed to resist heat and humidity, so they can be used behind stoves or sinks.
Their lightweight nature means you don’t have to worry about added stress on your walls, and you can even use them in spaces where traditional tiles would be too heavy.
Unlike vinyl stickers or paper decals, Smart Tiles have a gel-like surface that mimics the texture and shine of real tile. This gives your space a high-end look—without the heavy price tag or installation time. The gel surface also adds a slight cushioning, which is pleasant to the touch and makes the tiles feel more substantial than simple wall decals.
Another detail worth noting is that Smart Tiles are engineered to be non-yellowing. This means their colors and gloss finish stay true over time, even in rooms that get a lot of sunlight or artificial light. This is a feature many people overlook, but it helps keep your backsplash looking new for years.
How Smart Tiles Work
The technology behind Smart Tiles is simple but effective. Each tile is made with multiple layers:
- Top layer: A clear, gel-like finish that creates a glossy, raised look.
- Pattern layer: The printed design, which can imitate stone, glass, ceramic, or metal.
- Adhesive layer: A strong, pressure-sensitive glue that holds the tile in place.
- Backing liner: A protective sheet you peel off before installation.
To apply, you clean and dry your wall, peel off the liner, and press the tile onto the surface. If you make a mistake, you can reposition it for a short time. Once in place, the adhesive forms a tight bond.
Smart Tiles are designed to withstand common kitchen and bathroom conditions. The surface is water-resistant and easy to wipe clean. Most styles can handle temperatures up to 49°C (120°F), so they’re safe behind stovetops and sinks. However, direct exposure to open flames or very high heat should be avoided. While the adhesive is strong, it’s also engineered to be removable, which is essential for renters or those who like to change their decor frequently.
Another useful feature is that Smart Tiles can be trimmed and shaped easily without chipping or cracking. Traditional tiles often require a wet saw and careful handling, but with Smart Tiles, simple scissors or a utility knife are all you need.
This not only speeds up the process but also allows for more creative layouts, like herringbone or chevron patterns, without extra tools.
Beginners sometimes miss the importance of pressing firmly along all edges and seams. This ensures the adhesive bonds evenly, preventing future lifting or curling. Also, giving the tiles a few hours to adjust to room temperature before installation can further improve the adhesive’s grip.
Pros And Cons Of Smart Tiles Peel And Stick Backsplash
Before you decide, it’s important to understand both the benefits and the limitations of peel-and-stick backsplash tiles. Here’s an honest look at what to expect:
Pros
- Easy installation: No grout, mortar, or special tools needed. Most people can complete a small backsplash in a single afternoon.
- No mess: No dust, debris, or strong odors.
- Lightweight: Each sheet is thin and flexible, making it easy to handle and cut.
- Temporary or permanent: Can be removed later, making them ideal for renters or those who like to change styles.
- Wide variety: Many colors, patterns, and finishes to suit any decor.
- Cost-effective: Less expensive than traditional tile and professional installation.
- Quick transformation: You can update a room in just a few hours—great for weekend projects or last-minute home improvements.
- Minimal downtime: Since there’s no need for drying or curing, you can use your kitchen or bathroom right away.
Cons
- Surface requirements: Walls must be smooth, clean, and dry. Uneven or porous surfaces may not hold the tiles well.
- Durability: While Smart Tiles are strong, they are less durable than ceramic or glass in high-impact areas.
- Heat limits: Not suitable for areas with direct or extreme heat, such as immediately behind gas burners.
- Potential for peeling: In humid or steamy environments, edges may loosen over time if not applied correctly.
- Limited reusability: Once removed, tiles may not stick as well if reapplied.
- Not suitable for floors: Smart Tiles are designed for walls only and cannot withstand foot traffic.
One insight many beginners miss is that surface preparation is crucial. If you try to stick Smart Tiles to a wall that’s greasy, dusty, or textured, they may not adhere well. Another often-overlooked tip: allow the tiles to adjust to room temperature for at least 48 hours before installation for the best adhesive performance.
A less obvious advantage is how Smart Tiles can be used for test runs. If you’re not sure about committing to a bold color or pattern, you can install them and live with the look for a while. If you change your mind, removal is much simpler than with traditional tile, which involves breaking and scraping off old tiles.
Where To Use Smart Tiles Peel And Stick Backsplash
Smart Tiles are versatile, but they work best in specific areas. Here are the most popular places to install them:
- Kitchen backsplashes: Above countertops, behind sinks, and around stoves (with some distance from direct flames).
- Bathroom walls: Behind sinks, around mirrors, or inside shower alcoves (not in direct water spray).
- Laundry rooms: Behind appliances to protect walls from splashes and stains.
- Rental properties: Create a stylish look that can be removed when you move out.
- RV and boats: Lightweight, flexible tiles are perfect for mobile homes and marine use.
You can also use Smart Tiles for accent walls, fireplaces (only on the surround, not in direct heat), or even to refresh furniture. But always check the manufacturer’s guidelines for temperature and moisture limits.
A creative use many don’t consider is in small commercial spaces, such as coffee shops or pop-up stores. Since they’re removable, you can update your look for seasons or special events without major renovations. Even in kids’ playrooms or craft rooms, Smart Tiles can add color and be changed as children grow.
Comparing Smart Tiles With Traditional Backsplash
If you’re unsure whether Smart Tiles are right for you, it helps to compare them with traditional backsplash materials like ceramic, glass, or stone.
| Feature | Smart Tiles | Ceramic Tile | Glass Tile |
|---|---|---|---|
| Installation Time | 1-2 hours | 6-12 hours | 6-12 hours |
| Required Tools | Scissors, ruler | Trowel, grout, saw | Trowel, grout, saw |
| Mess | Very little | High | High |
| Cost per sq. ft. | $7-$12 | $15-$30 | $20-$40 |
| Removability | Easy | Difficult | Difficult |
| Durability | Moderate | High | High |
For most DIYers, the speed and simplicity of Smart Tiles are the biggest advantages. However, if you need extreme durability or plan to stay in your home for decades, classic tile may still be the gold standard.
A non-obvious benefit: with Smart Tiles, you avoid the learning curve of working with grout and mortar. Many people underestimate how tricky it is to get grout lines even and to clean up the mess. With Smart Tiles, your layout stays clean, and the seams are designed to overlap and hide any small mistakes.
How To Choose The Right Smart Tiles Peel And Stick Backsplash
There are dozens of styles and finishes to choose from. Here’s how to narrow your options:
1. Consider Your Room’s Style
Smart Tiles come in modern, classic, and transitional designs. For a sleek, contemporary kitchen, try a high-gloss subway tile or metallic finish. For a farmhouse feel, look for faux-marble or stone patterns.
If your space has a lot of natural elements—like wooden cabinets or stone countertops—choose tiles that echo these materials for a cohesive look. In contrast, bold colors or geometric patterns can add energy to plain, neutral rooms.
2. Color And Light
Lighter colors make small spaces look bigger and brighter. Dark tiles can add drama but might make a small kitchen feel crowded. Reflective surfaces bounce light, which is helpful in rooms without natural sunlight.
For example, in a windowless bathroom, choosing white or light gray tiles with a glossy finish can make the room feel more open and less claustrophobic. In a large, open kitchen, dark blue or charcoal tiles can create a cozy, intimate feeling.
3. Tile Size And Shape
Large-format tiles cover more wall with fewer seams, which can look clean and modern. Smaller mosaics or geometric patterns add texture and interest.
Rectangular subway tiles are timeless and easy to align, while hexagons or chevrons add a trendy twist. If you want to create a visual focal point—like a “feature strip” behind the stove—look for tiles with intricate designs or mixed materials.
4. Surface Texture
Some Smart Tiles mimic smooth glass, while others have a matte, stone-like finish. Touch samples if possible before buying, since this can affect how real the tiles appear.
Glossy finishes reflect light and are easier to clean, but can show fingerprints more easily. Matte finishes hide smudges and give a softer look, but may require more attention in grease-prone areas.
5. Room Conditions
If your backsplash is near a lot of steam or splashing water, choose a style that is rated for high humidity.
Pro tip: Order a few sample sheets before you commit. Stick them to your wall and live with them for a few days. This makes it easier to see how the color and finish look in your space and lighting.
An extra tip: check for “batch numbers” when buying your tiles. Tiles from the same batch will match better in color and pattern. If you run out and reorder later, you might notice slight differences.
Step-by-step Guide: Installing Smart Tiles Peel And Stick Backsplash
Installing Smart Tiles is much simpler than traditional tile, but a careful approach still matters. Here’s how to do it right:
1. Gather Your Supplies
- Smart Tiles sheets
- Measuring tape and pencil
- Level or straight edge
- Scissors or utility knife
- Cleaning supplies (mild soap, water, lint-free cloth)
- Optional: Hair dryer (for tricky corners)
- Painter’s tape (to temporarily hold tiles if needed)
- A soft cloth or roller for smoothing
2. Prepare The Wall
- Clean thoroughly. Remove grease, dust, and any old adhesive. The surface must be completely dry.
- Repair any holes or bumps. Fill and sand as needed. Tiles will not stick to flaking paint or uneven textures.
- Remove outlet covers and switch plates.
- Mark any problem areas. If you have glossy paint, lightly sand the area to help the adhesive grip better.
Preparation is often underestimated. Spending an extra 10–15 minutes making sure your surface is perfect can add years to the life of your tiles.
3. Measure And Plan Layout
- Measure the area carefully and calculate how many sheets you need. Add 10% extra for mistakes or future repairs.
- Lay out your tiles on a table or floor first. Check for pattern alignment and color variation.
- Mark a level line on your wall to guide your first row.
- Dry-fit the first row before peeling the backing to avoid mistakes.
Planning ahead prevents awkward gaps or uneven rows, especially in older homes where walls may not be perfectly straight.
4. Cut Tiles As Needed
- Use scissors or a sharp utility knife for straight lines.
- For outlets, trace the shape and cut carefully.
- Dry-fit tricky pieces before peeling the backing.
- For curves or tight corners, warm the tile gently with a hair dryer to make cutting and fitting easier.
Always cut tiles from the back side for cleaner lines. If you’re cutting around a tricky shape, start small—it's easier to trim off more than to fix a piece that’s too small.
5. Peel And Stick
- Start at the edge of your area. Peel off part of the backing, align the tile, and press firmly. Work slowly to avoid bubbles.
- Overlap the edge of each tile slightly to hide seams.
- Smooth down with your hand or a soft cloth.
- For corners or curved areas, use a hair dryer to gently warm the tile so it bends more easily.
If you notice any air bubbles, gently lift the tile and reapply, pressing from the center outward. You can use a plastic smoothing tool or even a credit card wrapped in a cloth to press out bubbles.
6. Finish And Clean
- Replace outlet covers and switch plates.
- Wipe the surface with a damp cloth to remove fingerprints.
- Do not scrub or expose to water for 24 hours to allow adhesive to cure.
- If you see any lifting edges the next day, press them down again or use a tiny bit of extra adhesive.
Extra tip: If you notice an edge lifting in the first day or two, press it down again or use a small dab of strong double-sided tape under the corner.
Maintenance And Longevity Of Smart Tiles
Caring for Smart Tiles is simple, but there are a few things to keep in mind if you want them to last:
- Wipe with a damp cloth and mild soap; avoid abrasive cleaners.
- Do not use scouring pads or harsh chemicals, as these can scratch the surface.
- For greasy areas, use a gentle degreaser and rinse well.
- Watch for edges lifting in steamy or wet areas. Press them back down as soon as you notice.
- Avoid exposing the tiles to direct flames or temperatures above 49°C (120°F).
- Do not hang heavy objects from or directly on the tiles, as this can pull them away from the wall.
Smart Tiles typically last 5–10 years in a well-maintained kitchen or bathroom. In high-traffic or extreme conditions, you might see some wear sooner. The good news is that repairs are easy—just peel off a damaged tile and stick on a new one.
Many users overlook that regular cleaning helps prolong the life of Smart Tiles. Dust and grease can build up over time, weakening the adhesive if not removed. A monthly wipe-down can make a big difference.
A second non-obvious tip: if you need to replace just a small section, try to match the batch number so the color and shine stay consistent.
Removing Smart Tiles Peel And Stick Backsplash
One of the main reasons people choose Smart Tiles is that they can be removed without damaging the wall. Here’s how to do it cleanly:
- Warm the tile with a hair dryer. This softens the adhesive and makes removal easier.
- Gently lift a corner with a plastic scraper or your fingernail.
- Slowly peel the tile away from the wall. Go slowly to avoid pulling off paint.
- If any adhesive remains, clean it off with warm, soapy water or a gentle adhesive remover.
- Let the wall dry completely before repainting or applying new tiles.
If the wall was painted with high-quality paint and properly prepared, there should be little to no damage. However, on older or poorly painted surfaces, some touch-up may be needed.
If you plan to install new Smart Tiles immediately, wipe the wall and let it dry before starting your next project.
Common Mistakes To Avoid With Peel And Stick Backsplash
Even though Smart Tiles are beginner-friendly, there are a few pitfalls to watch out for:
- Skipping cleaning: Tiles won’t stick to grease, dust, or moisture.
- Applying to textured walls: Surfaces like brick, stucco, or orange peel texture prevent a tight bond.
- Rushing the process: Take time to measure, align, and smooth each tile.
- Ignoring temperature: Install when the room is between 18°C and 35°C (65°F and 95°F) for best results.
- Overstretching tiles: Forcing a tile to fit can cause edges to curl.
- Not allowing adhesive to cure: Avoid scrubbing or getting tiles wet for at least 24 hours.
- Not checking tile orientation: Some patterns only align in one direction—double-check before sticking!
A less obvious mistake: not buying enough extra tiles. Because colors and patterns can vary slightly between batches, it’s wise to purchase a bit more than you need at first.
Another mistake is not planning for outlets and corners in advance. Cutting around these areas after most of the wall is done can be stressful, so measure and plan before you start.
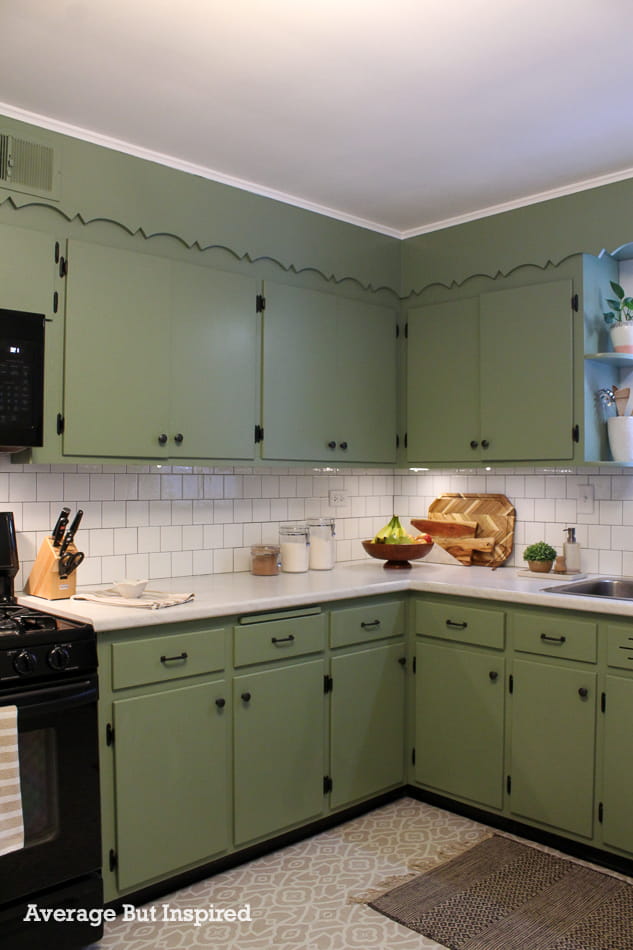
Creative Ideas For Using Smart Tiles
While kitchens and bathrooms are the most popular spots, you can use Smart Tiles in lots of creative ways:
- Accent walls: Cover a small section of wall for a pop of color or pattern.
- Furniture: Update old dressers, tabletops, or bookshelves with peel-and-stick tiles.
- Stair risers: Add visual interest to stairs without permanent changes.
- Fireplace surrounds: Use tiles on the outside of a fireplace for a bold look (not inside the firebox).
- Closets or laundry rooms: Make utilitarian spaces more inviting.
- Headboards: Create a unique, wipe-clean headboard for a bedroom.
- Backs of kitchen islands or breakfast bars: Add a stylish touch in open-plan spaces.
Some designers even use Smart Tiles for craft projects, backs of bookshelves, or entryway mudrooms. Just remember to choose areas that meet the manufacturer’s recommendations for temperature and moisture.
For renters, these creative uses mean you can personalize your space without risking your deposit. For homeowners, it’s an easy way to experiment with trends or seasonal looks.
Smart Tiles Peel And Stick Backsplash: Cost Breakdown
For many people, the main attraction of Smart Tiles is their affordability compared to traditional tile. Here’s a typical cost breakdown:
| Item | Smart Tiles | Traditional Tile |
|---|---|---|
| Material (per sq. ft.) | $7–$12 | $15–$40 |
| Tools & Supplies | $0–$10 | $50–$150 |
| Labor (DIY) | $0 | $200–$500 |
| Total (10 sq. ft.) | $70–$130 | $400–$900 |
These numbers are averages. The cost of Smart Tiles depends on the style and the retailer, but they are generally much less expensive overall—especially if you install them yourself.
If you make a mistake with Smart Tiles, replacing a single tile or even a whole section is relatively cheap and quick. With traditional tile, mistakes can mean significant extra cost and time.
Another hidden cost to consider: traditional tile often requires sealers or regular maintenance, while Smart Tiles need only basic cleaning.
Environmental Impact: Are Smart Tiles Eco-friendly?
Many homeowners care about the environmental impact of their renovation choices. Smart Tiles have some green benefits:
- No grout or mortar waste: Traditional tile jobs produce extra material and chemical waste.
- No water needed: Installation is dry and chemical-free.
- Low VOC: The tiles are made without harmful volatile organic compounds.
- No power tools required: Less energy used during installation.
However, Smart Tiles are made from synthetic materials, so they are not biodegradable. If sustainability is a top concern, it’s worth asking the manufacturer about recycling options or choosing tiles made from recycled content.
Another eco-friendly advantage is the longevity and removability of Smart Tiles. If you update your look every few years, you create less waste than if you were tearing out ceramic tile and disposing of grout and broken pieces.
For more on eco-friendly building materials, see resources at EPA Green Homes.
Real-life Examples And Testimonials
Hearing from people who have actually used Smart Tiles can help you decide if they’re right for your space. Here are some real-life stories:
Sarah, a renter in New York City: “My landlord wouldn’t let me put up real tile, but the old backsplash was awful. I used white subway Smart Tiles and finished the whole project in two hours. When I moved out, they peeled off with no problem. My kitchen looked brand new!”
James, a father of two: “We wanted to redo our laundry room on a budget. The peel-and-stick tiles were so easy my teenage son helped. They’ve held up for two years, even with lots of splashes and heat from the dryer.”
Linda, a retiree: “I was nervous about doing a DIY project, but the instructions were clear. The hardest part was cutting around outlets. I love how my bathroom looks now.”
Martin, a small business owner: “I used Smart Tiles to create a feature wall in my cafe. Customers compliment it all the time, and I can change the look for holidays or events. If a tile gets damaged, replacement is easy.”
Common insight: Most users say the biggest surprise is how real the tiles look once installed. Some mention that the surface is not as hard as ceramic, but for most areas, the convenience wins out.

How To Care For Your Smart Tiles Peel And Stick Backsplash
To keep your new backsplash looking its best, follow these simple tips:
- Wipe spills as soon as possible. Acidic foods like tomato sauce can stain if left for long periods.
- Use a soft cloth or sponge for cleaning.
- Test any cleaning product on a small, hidden area first.
- Avoid hanging heavy items (like shelves) directly from the tile surface.
- If you need to remove a single tile, heat with a hair dryer first to prevent wall damage.
- For regular cleaning, a simple water and vinegar solution works well. Avoid bleach or ammonia-based products.
- For stubborn marks, use a soft-bristled brush and gentle soap.
Extra insight: If you scratch a tile, you can sometimes fix small marks with a bit of clear nail polish. For larger damage, simply replace the affected sheet.
Also, try to avoid letting water sit on the edges of your tiles, especially in areas like behind the sink. Even though they are water-resistant, prolonged exposure to standing water can weaken the adhesive over time.
Frequently Asked Questions
What Surfaces Can Smart Tiles Stick To?
Smart Tiles work best on smooth, flat, and clean surfaces. Painted drywall, glass, laminate, and most existing ceramic tiles are ideal. They do not stick well to textured walls, brick, or surfaces with peeling paint.
Can I Use Smart Tiles Behind A Gas Stove?
You can use Smart Tiles behind a stove if there is at least 20 cm (8 inches) between the tiles and the burners. They should never be installed where they will be exposed to direct flames or temperatures above 49°C (120°F).
Are Smart Tiles Waterproof?
Smart Tiles are water-resistant, not fully waterproof. They handle splashes and humidity well, but should not be installed where they will be in constant contact with running water, such as inside a shower stall.
How Long Do Smart Tiles Last?
With proper installation and care, Smart Tiles can last 5–10 years. In high-moisture or high-traffic areas, you may notice some wear sooner, but they are easy to replace if needed.
Can Smart Tiles Be Removed Without Damaging The Wall?
Yes, in most cases. Warm the tiles with a hair dryer, peel slowly, and clean off any leftover adhesive. On well-painted walls, there should be little to no damage. Be careful with older or poorly painted surfaces.
Smart Tiles peel and stick backsplash offers a creative, practical solution for modernizing your kitchen, bathroom, or any room in your home. With so many colors and patterns to choose from, and a process that almost anyone can handle, it’s never been easier to add style and value—without a big investment of time or money.
Whether you’re a renter, a DIY enthusiast, or just someone who wants change without commitment, Smart Tiles are worth considering for your next home project.