Peel and stick backsplash tile has changed how people update their kitchens and bathrooms. In the past, tile work meant hiring a professional, using messy mortar, and waiting for grout to dry. Now, anyone can refresh a wall in a few hours—with no special tools or skills.
For homeowners, renters, and even business owners, peel and stick tile offers a fast, affordable way to get a new look. But before you buy, it’s important to understand the types, benefits, installation, and care of these tiles. This guide covers everything you need to know, whether you want a small accent or a complete room transformation.
What Are Peel And Stick Backsplash Tiles?
Peel and stick backsplash tiles are thin decorative panels with adhesive backing. You simply peel off the protective layer and press the tile onto a clean surface. Most tiles are made from vinyl, gel, or metal, but you’ll also find stone and glass options. Their main purpose is to protect the wall from water and stains, while adding style. They come in many sizes, patterns, and colors, so it’s easy to match your taste.
Unlike traditional ceramic or porcelain tiles, peel and stick tiles are lightweight and flexible. Some even mimic real materials, like marble or subway tile, so closely that guests may not notice the difference. These tiles are popular in rental homes, apartments, and even RVs because they’re usually removable without damage.
Why Choose Peel And Stick Backsplash Tile?
People choose peel and stick tiles for several reasons. Here’s why they’ve become so popular:
- Easy Installation: You don’t need tile saws, grout, or special skills. Most people can install them with basic tools like a ruler and scissors.
- Time-Saving: A small kitchen or bathroom wall can be covered in less than a day.
- No Mess: There’s no wet mortar, dust, or grout to clean up.
- Cost-Effective: Materials and labor for traditional tile add up quickly. Peel and stick tiles cost less up front and save on installation fees.
- Removable: Many brands are renter-friendly and can be taken down without harming the wall.
- Variety: Hundreds of styles, from classic subway to modern hexagons, fit almost any decor.
- Low Maintenance: They’re water-resistant and easy to wipe clean.
One thing beginners often overlook: not all peel and stick tiles are the same quality. Cheaper tiles may peel off or discolor in steam and heat. It’s worth reading reviews and buying from trusted brands.
Types Of Peel And Stick Backsplash Tiles
The market offers a wide range of materials and finishes. Here’s a closer look:
Vinyl Peel And Stick Tiles
Vinyl is the most common material. These tiles are flexible, waterproof, and very affordable. They’re easy to cut and fit around outlets. However, vinyl tiles may not have the depth or texture of real stone.
Gel Peel And Stick Tiles
Gel tiles have a soft, raised finish that mimics glass or ceramic. The gel layer adds shine and a 3D effect. They’re usually more durable than thin vinyl, but can cost slightly more.
Metal Peel And Stick Tiles
Some peel and stick tiles use thin layers of real metal—like aluminum or stainless steel—on a sticky backing. These are great for a modern, industrial look. They’re tougher and resist heat better, but may need sharper tools for cutting.
Stone And Glass Peel And Stick Tiles
Some high-end products use real stone or glass pieces set into a peel and stick sheet. These tiles look and feel authentic, but installation requires careful measuring and, sometimes, extra adhesive. They’re heavier and work best on very smooth surfaces.
Faux Materials
Some tiles are made to look like marble, wood, or other expensive finishes. These are often printed on vinyl or gel, giving the illusion of natural material at a fraction of the price.
Custom And Designer Tiles
A few companies offer custom colors, patterns, or even photo tiles. These let you create a one-of-a-kind backsplash for your home or business.
Where To Use Peel And Stick Backsplash Tiles
Peel and stick tiles are versatile, but they’re not perfect for every location. Here are the best places to use them:
- Kitchen backsplash: The most popular spot. They protect walls from water, oil, and food stains.
- Bathroom walls: Around sinks and vanities, where moisture is common.
- Laundry rooms: Behind washers and utility sinks.
- Rental properties: Because they’re removable, landlords and tenants both benefit.
- Accent walls: Use a bold pattern to create a feature wall in a bedroom, hallway, or living room.
- RV and camper remodels: Lightweight tiles are ideal for small spaces on the move.
- Commercial spaces: Small coffee shops, salons, or offices sometimes use them to add style quickly and affordably.
Surfaces To Avoid
Not all walls are suitable for peel and stick tiles. They stick best to smooth, clean, dry surfaces like painted drywall, glass, or laminate. Avoid uneven or rough walls, brick, stone, or dirty/greasy areas. Tiles may not hold well on textured paint or wallpaper.
Popular Styles And Patterns
With hundreds of choices, finding the right style can be overwhelming. Here are some of the most popular patterns:
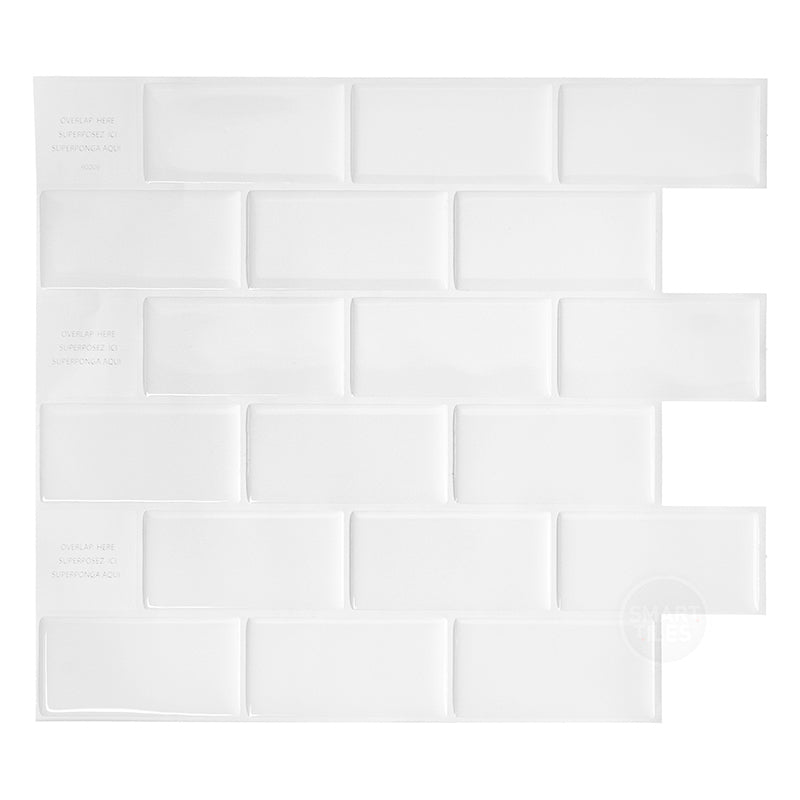
- Subway tile: Classic and timeless. Mimics the look of ceramic subway tiles.
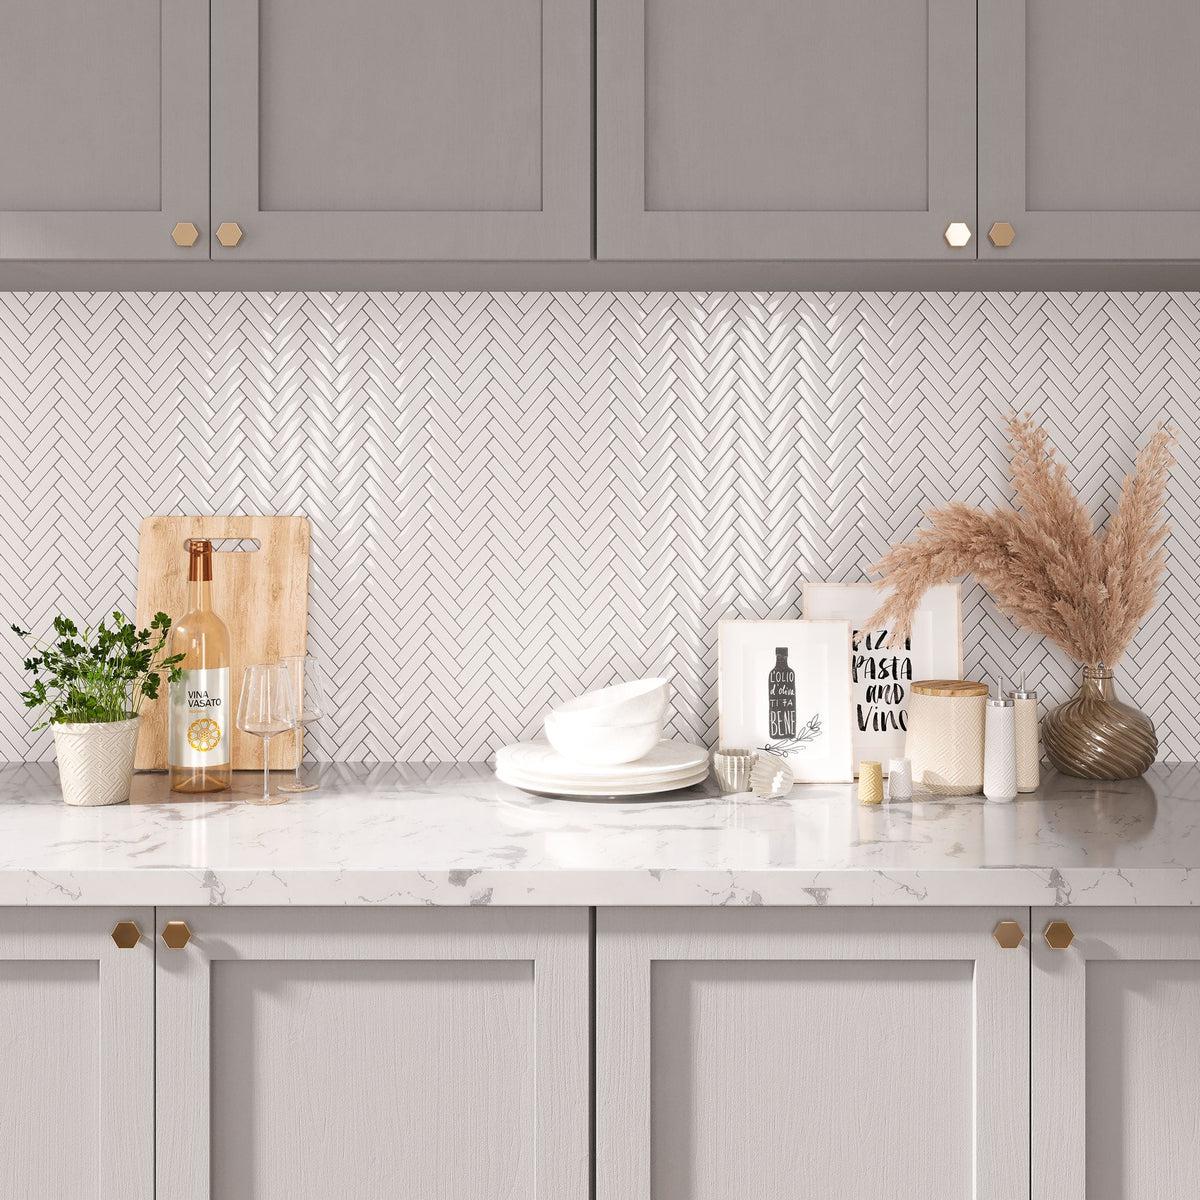
- Herringbone: Zigzag pattern that adds movement and interest.
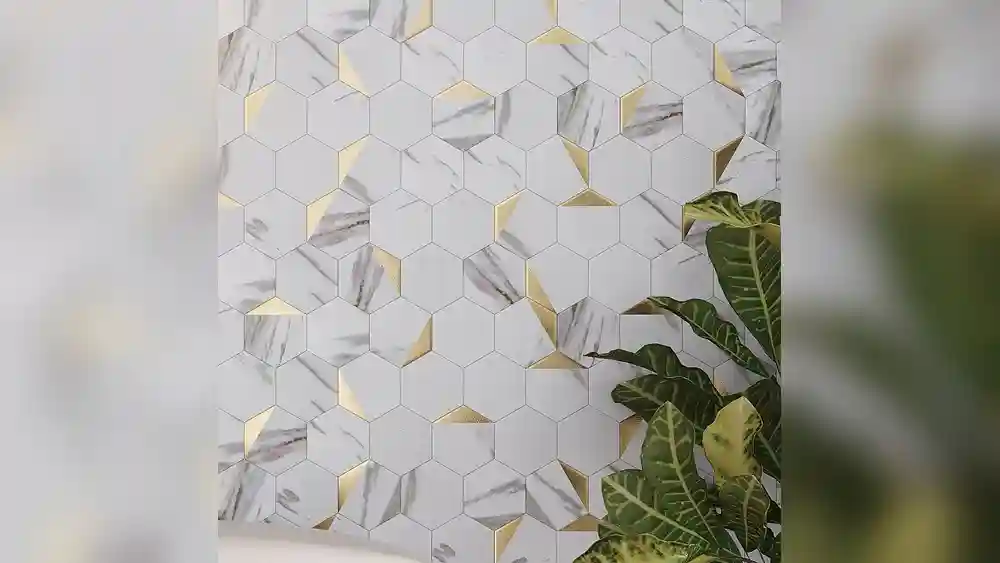
- Hexagon: Six-sided shapes create a modern, geometric feel.
- Marble look: Soft veining and white backgrounds for a luxury vibe.
- Mosaic: Small square or rectangular pieces in a repeating pattern.
- Brick: Exposed brick looks—great for industrial or farmhouse styles.
- Moroccan and arabesque: Curved, global-inspired shapes.
- Metallic: Silver, gold, or copper finishes add shine.
- Wood look: Printed to look like reclaimed wood or shiplap.
- Bold colors: Deep blue, green, or black tiles for dramatic contrast.
A common mistake is choosing a busy pattern for a small space, which can feel overwhelming. When in doubt, simple designs like subway or marble look good in almost any kitchen or bath.
How To Choose The Right Peel And Stick Tile
Selecting the right tile goes beyond picking a pattern. Here are key factors to consider:
1. Material
Vinyl is easy to work with and budget-friendly. Gel tiles offer a glass-like shine, while metal and stone add real texture but are harder to cut. Think about your space and how much wear it gets.
2. Water And Heat Resistance
If you’re tiling behind a stove or sink, check if the tiles are rated for heat and moisture. Some cheap vinyl tiles can warp or peel when exposed to steam.
3. Surface Compatibility
Smooth, non-porous walls are best. If your wall is textured or has old wallpaper, tiles may not stick well.
4. Removability
For renters, look for brands that guarantee easy removal. Some adhesives are stronger and can damage paint.
5. Size And Pattern Repeat
Larger tiles cover more area and have fewer seams. But in tight spaces, smaller tiles are easier to fit. Some patterns require careful alignment; check if tiles are designed to match up easily.
6. Brand Reputation
Read reviews and buy from brands known for quality adhesives. Poor-quality tiles may not last, fade, or be hard to remove.
7. Price And Quantity
Calculate how many square feet you need. Buy a little extra for mistakes or future repairs. Some brands sell tiles by the sheet, others by the box.
8. Color And Finish
Glossy tiles reflect light and feel modern. Matte finishes are subtle and hide fingerprints. Bring home samples if possible to see how they look with your lighting.
Step-by-step Installation Guide
Installing peel and stick backsplash tile is easier than traditional tile, but a careful approach gives the best results. Here’s how to do it:
What You’ll Need
- Peel and stick backsplash tiles
- Measuring tape
- Pencil
- Level
- Utility knife or scissors
- Cleaning cloth
- Rubbing alcohol or degreaser
- Cutting mat or old magazine (to protect surfaces)
Preparation
- Clean the wall: Remove grease, dust, and any loose paint. Use a degreaser or rubbing alcohol near stoves.
- Dry the surface: Moisture prevents good adhesion.
- Mark your layout: Use a pencil and level to draw a straight line where the first row will go. Start at the center or a visible edge for symmetry.
Cutting Tiles
- Measure carefully: Plan cuts for outlets, corners, and edges. Always double-check before cutting.
- Cut tiles: Use a sharp utility knife for straight lines. For curves, heavy scissors can help. For metal or glass tiles, use snips or a tile cutter.
Sticking Tiles
- Peel and align: Remove the backing from the tile. Gently press the tile onto the wall, starting at one edge.
- Smooth out bubbles: Press firmly with your hand or a soft cloth to push out air.
- Continue row by row: Overlap seams as directed by the manufacturer. Check alignment as you go.
- Trim for outlets and switches: Cut tiles to fit, leaving enough room for cover plates to sit flat.
Finishing Touches
- Check edges: If tiles have exposed edges, use silicone caulk or edge trim for a clean look.
- Wait before cleaning: Let adhesive set for 24 hours before wiping tiles or exposing them to steam.
Installation Table: Tools And Steps
Here is a summary of essential installation items and steps:
| Step | Tools Needed | Key Action |
|---|---|---|
| Preparation | Cleaning cloth, alcohol | Clean and dry wall |
| Measuring & Layout | Tape measure, level, pencil | Mark guidelines |
| Cutting | Utility knife, scissors | Trim tiles for fit |
| Sticking | Hands/cloth | Peel and press tiles |
| Finishing | Edge trim, caulk | Seal and clean edges |
Common Mistakes And How To Avoid Them
Even though installation is simple, beginners often make avoidable errors. Here are some to watch for:
Not Cleaning The Wall Properly
Grease, dust, or soap residue keeps tiles from sticking. Take extra time cleaning—especially in kitchens.
Skipping Layout Lines
Without guidelines, tiles may drift or become uneven. Always draw straight lines as a reference.
Rushing The First Row
The first row sets the tone. If it’s crooked, all rows will follow. Take time to get it perfectly level.
Poor Cutting
Dull knives or rushing cuts can lead to jagged edges. Use a sharp blade and cut slowly.
Overlapping Or Gapping
If you don’t align the tiles as the design requires, you’ll see visible seams or pattern mismatches. Always check instructions for overlap or butt-joint requirements.
Forgetting Expansion Gaps
In rooms with big temperature changes, leave a tiny gap at the edge for expansion. Hide it with trim.
Not Pressing Firmly Enough
If you don’t press tiles down well, air pockets can develop and tiles may peel off later. Use your palm or a soft roller.
A pro tip: Before starting, stick a test tile in a hidden spot. Wait 24 hours to see how well it holds.

Pros And Cons Of Peel And Stick Backsplash Tile
Every product has strengths and weaknesses. Here’s a balanced look at peel and stick tile:
Pros
- Quick and easy installation for most DIYers.
- Low cost compared to traditional tile.
- Minimal mess: No grout, mortar, or wet saws.
- Removable: Ideal for renters or short-term updates.
- Variety of styles to fit any decor.
- Lightweight: Safe for most walls.
Cons
- Not as durable as ceramic or stone in heavy-use areas.
- May loosen in high heat, humidity, or on rough surfaces.
- Limited lifespan: May need replacing after several years.
- Some adhesives can damage paint during removal.
- Fewer options for custom shapes or mosaic designs.
- Not always waterproof at seams; not suitable for inside showers.
Many people overlook the importance of surface preparation. Even the best tiles can fail if the wall isn’t smooth and clean.
Maintenance And Cleaning Tips
Peel and stick backsplash tiles are low maintenance, but a little care keeps them looking good longer.
- Wipe spills quickly: Most tiles resist water and stains, but don’t let spills sit for hours.
- Use gentle cleaners: Avoid harsh chemicals or abrasive pads. Warm water and mild soap are best.
- Avoid steam and direct heat: Some tiles can soften or peel if exposed to boiling water or open flames.
- Check seams: If you see edges lifting, press them back down or use a small dab of adhesive.
- Dust regularly: Especially for textured or 3D tiles, as dust can build up.
For stubborn stains, try a soft sponge with a little vinegar and water, but test in a hidden spot first.
Comparing Peel And Stick Tile To Traditional Tile
How do peel and stick tiles stack up against traditional ceramic or stone? Here’s a side-by-side comparison:
| Feature | Peel and Stick Tile | Traditional Tile |
|---|---|---|
| Installation Time | 1-4 hours (small job) | 1-2 days (includes drying) |
| Tools Required | Scissors, knife, ruler | Tile cutter, grout, trowel |
| Mess | Very little | High (grout, mortar) |
| Cost | Low to moderate | Moderate to high |
| Durability | Good, but less than ceramic | Excellent |
| Removability | Often easy, sometimes damages paint | Permanent |
| Water Resistance | Good, except at seams | Excellent (with grout) |
| Style Options | Many | Unlimited (custom shapes, colors) |
Cost Breakdown: What To Expect
Peel and stick backsplash tiles are known for being budget-friendly, but prices can vary. Here’s what to expect:
- Vinyl or gel tiles: $5 to $12 per square foot
- Metal tiles: $10 to $20 per square foot
- Real stone or glass: $15 to $30 per square foot
A typical kitchen backsplash (about 30 square feet) costs between $150 and $400 for materials. Add a little extra for mistakes or future repairs. Compare this to traditional tile, which can run $600–$1,200 for materials and labor.
Other expenses to consider:
- Edge trim (optional): $10–$40 depending on length and material
- Cleaning supplies: Usually under $10
- Tools: Most people already have scissors and a ruler
One insight many miss: Sometimes, “cheap” tiles cost more in the long run if they peel or need replacing. Buy the best quality you can afford.
Environmental Impact And Safety
Many peel and stick tiles are made from PVC (vinyl), which is not biodegradable. Some brands now offer eco-friendly tiles made with recycled materials or low-VOC adhesives. If you’re concerned about air quality, look for products labeled as phthalate-free or low emission.
Installation is safe because you don’t need toxic glues or grout. But always ventilate the area if a strong odor is present during installation.
Peel and stick tiles are also safer for kids and pets compared to glass or ceramic, which can break and cause sharp edges.
How To Remove Peel And Stick Backsplash Tiles
If you’re a renter or simply want to change styles, removing tiles is usually simple. Here’s how:
- Start at a corner: Use a utility knife or putty knife to gently lift the edge.
- Peel slowly: Pull the tile back at a low angle. Don’t yank—this can pull off paint.
- Remove residue: If adhesive stays behind, use rubbing alcohol, a gentle adhesive remover, or warm soapy water.
- Repair wall if needed: If paint peels, lightly sand and touch up with matching paint.
Pro tip: For stubborn tiles, warming with a hair dryer softens the adhesive and makes removal easier.
Creative Uses For Peel And Stick Backsplash Tiles
Peel and stick tiles aren’t just for kitchens and baths. Here are a few creative ideas:
- Update old furniture: Cover table tops, dressers, or cabinet doors for a new look.
- Create art panels: Arrange tiles in a frame for easy wall art.
- Decorate stair risers: Add pattern and color to boring stairs.
- Line shelves or closets: Protect surfaces and add style.
- Temporary event decor: Use tiles for parties, pop-up shops, or photo backdrops.
Some people use leftover tiles for coasters, serving trays, or even small craft projects.
When To Call A Professional
While most people can handle peel and stick tile, a few situations may need expert help:
- Large commercial spaces: A pro ensures speed and perfect alignment.
- Very uneven walls: A contractor can smooth out surfaces before tiling.
- Complex patterns: Some designer tiles need precise cuts and matches.
- Permanent installations: If you want a “forever” backsplash, traditional tile may be better.
If you’re unsure, many home improvement stores offer installation services for a fee.
Top Brands For Peel And Stick Backsplash Tile
Choosing a trusted brand is key to getting good results. Here are some of the best-known names:
- Smart Tiles: Known for high-quality gel tiles with strong adhesive and realistic patterns.
- Art3d: Offers a wide variety of materials and styles, including stone, metal, and 3D patterns.
- Tic Tac Tiles: Popular for affordable prices and easy installation guides.
- RoomMates: Specializes in vinyl tiles with fun patterns and colors.
- Aspect: Focuses on metal and glass tiles for a modern look.
Always check reviews and look for warranties. Some brands offer up to a 10-year guarantee against peeling or fading.
Real-life Examples And Case Studies
Case 1: Small Kitchen Makeover
A couple living in a rental apartment wanted to upgrade their kitchen but couldn’t install permanent fixtures. They chose white subway peel and stick tiles for $9 per square foot. The whole project took one afternoon and cost $250. Their landlord was happy, and the tiles peeled off cleanly when they moved out.
Case 2: Bathroom Update On A Budget
A homeowner wanted to refresh their outdated bathroom vanity. They installed marble-look gel tiles behind the sink. The project took two hours and under $100. Three years later, the tiles still looked new—proof that a small change can make a big impact.
Case 3: Rv Remodel
A family updating their RV used peel and stick wood-look tiles to cover the kitchen wall. The lightweight design didn’t add extra load, and installation was easy with only scissors. They loved the new look and shared their project with friends.
Troubleshooting: What To Do If Something Goes Wrong
Even with good planning, problems can happen. Here’s how to fix common issues:
Tiles Won’t Stick
- Check for grease, dust, or moisture.
- Warm the tile with a hair dryer, then press firmly.
- Use extra adhesive on stubborn spots.
Edges Peel Up
- Press down with a roller or firm cloth.
- Add a small bead of clear glue or caulk along the edge.
Gaps Between Tiles
- Try repositioning tiles; some can be lifted and reset.
- Fill tiny gaps with color-matched caulk.
Pattern Doesn’t Match
- Double-check tile orientation; some are directional.
- Start over if possible, or use a border to hide mismatch.
Many brands offer customer support if you have issues. Save your packaging and receipts.
Future Trends In Peel And Stick Tile
The world of peel and stick backsplash tile is always evolving. Here’s what to expect in the coming years:
- More eco-friendly materials: New options with recycled content and safer adhesives.
- Advanced textures: Tiles that feel even closer to real stone or ceramic.
- Smart tiles: Some companies are experimenting with light-up or interactive tiles.
- Expanded color choices: More bold, custom, and matte finishes.
- Digital printing: Ultra-realistic patterns, including custom photo tiles.
As technology improves, expect peel and stick tiles to look and last even better.
Frequently Asked Questions
What Surfaces Can Peel And Stick Backsplash Tile Be Applied To?
Peel and stick tiles work best on smooth, clean, and dry surfaces like painted drywall, glass, and laminate. Avoid using them on rough, textured, or damp walls, as the adhesive won’t hold well.
Can Peel And Stick Tiles Be Used Behind A Stove Or In A Shower?
Most are fine behind a stove, but check if they’re rated for high heat. Not all tiles can handle steam or direct flames. They’re not recommended inside showers where water hits directly, as seams can leak.
How Long Do Peel And Stick Backsplash Tiles Last?
With good care, quality tiles last 5 to 10 years. Exposure to steam, heat, or frequent cleaning can shorten their lifespan. Some brands offer warranties for peace of mind.
Are Peel And Stick Tiles Safe For Renters?
Yes. Most brands are renter-friendly and can be removed without damaging walls if instructions are followed. Always test in a small spot first.
Where Can I Find More Information And Reviews?
For more details on peel and stick tile products, installation tips, and user experiences, visit The Home Depot.
A stylish, durable backsplash doesn’t require a huge budget or a professional installer. Peel and stick tiles open up new possibilities for kitchens, baths, and beyond. With the right choice and a little care, you can enjoy a fresh look in just a few hours—and change it again whenever you like.