
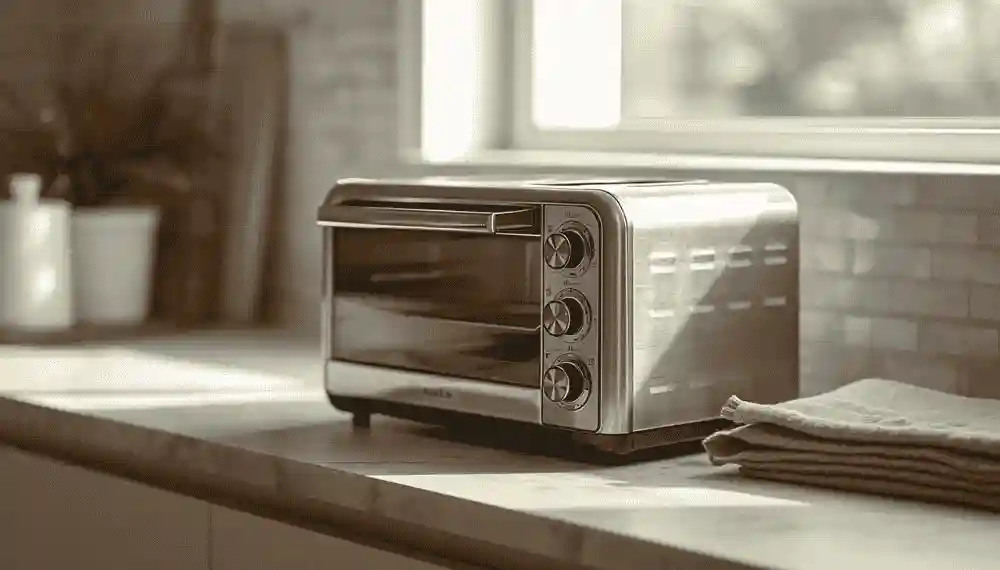
By Zahid Hussain | Kitchen appliance reviewer & home cook
If you use your toaster oven more than once a week, it's probably dirtier than you think. Grease doesn't just sit on the surface, it bakes onto it every time you turn the dial, slowly turning into the kind of sticky, smoky film that makes your kitchen smell like a diner at closing time. The good news is that cleaning a toaster oven properly doesn't require anything you don't already have under your sink, and it takes less time than most people assume. It does, however, require knowing which parts you can scrub freely and which parts will break if you so much as press too hard with a sponge.
This guide walks through the full process zone by zone, the crumb tray, the interior walls, the glass door, the heating element, and the exterior, plus the mistakes that quietly damage toaster ovens over time, the conflicting advice you'll find floating around the internet, and how often you actually need to do this.
Why Toaster Ovens Get Dirty Faster Than People Expect
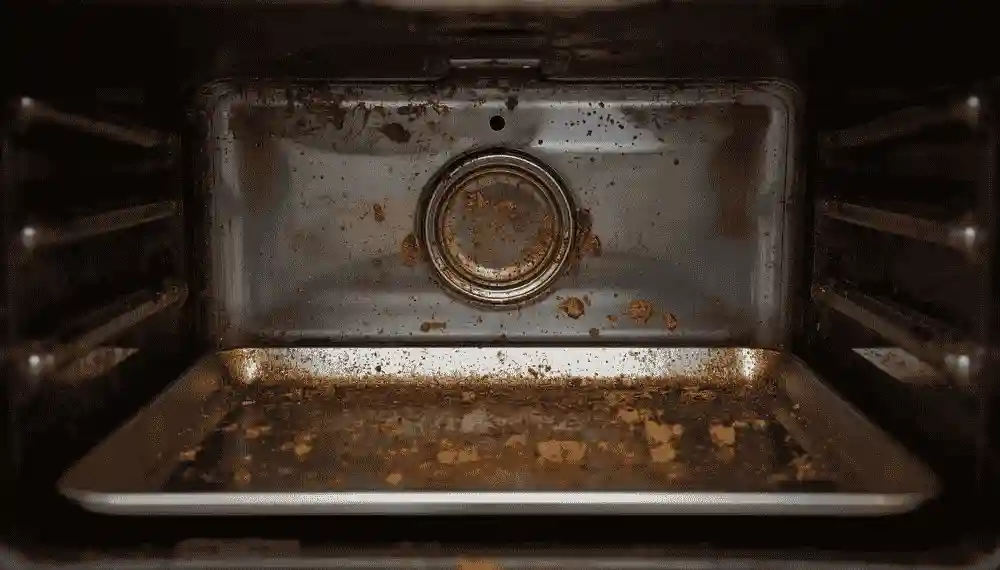
A full-size oven hides its mess behind a closed door most of the day. A toaster oven sits out on the counter, gets used multiple times a day, and has a much smaller interior, which means grease, crumbs, and splatters have far less room to spread out and far more surface area to stick to relative to the size of the appliance. Every time you toast, broil, or roast something, the heat doesn't just cook your food, it also slowly cooks any residue left over from the last few uses, turning loose crumbs into carbon and thin grease splatters into a varnish-like coating on the walls and glass.
This buildup isn't just a cosmetic issue. Grease and crumb accumulation near the heating element is a genuine fire risk, and a dirty interior can affect how evenly your toaster oven cooks, since baked-on residue interferes with heat reflection inside the cavity. A neglected toaster oven also tends to smoke and smell when you turn it on, which is usually the first sign that cleaning is overdue rather than a sign something is broken.
Before You Start: Safety Basics That Actually Matter
Always unplug the toaster oven and let it cool completely before you touch any cleaning product or sponge to it. This sounds obvious, but it's the single most skipped step, and it's the one with real consequences. Water and electricity don't mix, and a heating element that's still warm can cause certain cleaning agents to off-gas or even scorch.
A few other ground rules worth knowing before you dive in:
- Never submerge the toaster oven body in water, only the removable parts (tray, racks, drip pan) should ever touch a sink full of water.
- Avoid steel wool, metal scouring pads, and abrasive scrub brushes on the interior walls or glass. These scratch protective coatings and create rough patches that grime sticks to even faster next time.
- Skip traditional oven cleaners (the spray-on kind meant for full-size ovens). They're formulated for much larger, more heavily insulated cavities and can release fumes that are too concentrated for a toaster oven's compact, less-ventilated interior, and they can damage interior coatings.
- Let any cleaning paste or solution sit for a few minutes before scrubbing. Patience does more work than elbow grease here.
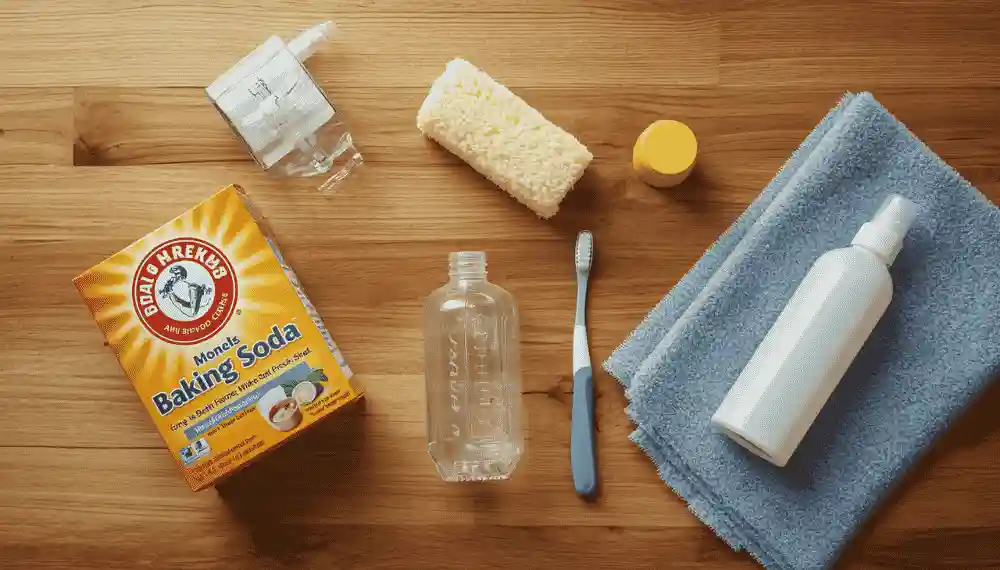
What You'll Need
Almost everything on this list is already in your kitchen, which is part of why this is one of the most search-friendly, low-cost appliance cleaning jobs out there. A natural way to clean a toaster oven, without harsh chemicals, almost always comes down to these basics:
- Baking soda
- White vinegar
- Mild dish soap
- A soft sponge or microfiber cloth
- A soft-bristled toothbrush (for corners and edges)
- A non-abrasive plastic scraper or old gift card (for stuck-on crusts)
- Paper towels or a dry cloth
- A magic eraser-style melamine sponge (optional, useful for light scorch marks on glass)
It's worth understanding briefly why these particular ingredients show up in almost every reliable cleaning method, since it explains why substituting something harsher usually backfires. Baking soda is mildly alkaline and just abrasive enough to break down grease and carbon without scratching most coated surfaces, which is why it works on everything from the glass door to the crumb tray. Vinegar is acidic, and when it meets baking soda, the two react and fizz, a reaction that helps lift residue mechanically rather than just chemically dissolving it. Dish soap, meanwhile, is doing the simplest job of all, breaking the surface tension of grease so it lifts off in water instead of just smearing around. None of these ingredients are strong enough to damage interior coatings on their own, which is exactly why they're the safer choice over commercial degreasers or oven-specific sprays.
Quick Clean vs. Deep Clean: Knowing the Difference
Not every cleaning session needs to involve every step above, and treating a quick wipe-down the same as a full deep clean is a common reason people start to dread the task. A quick clean, the kind worth doing every few uses, is just emptying the crumb tray, brushing out loose debris, and wiping the glass if it's visibly smudged. It takes under five minutes and prevents most buildup from ever reaching the baked-on stage.
A deep clean is everything covered in the step-by-step section above, including the baking soda paste treatment on the interior walls, glass, and trays. This is the version worth doing every few weeks, or sooner if you've cooked something particularly greasy like bacon or a marinated protein. Knowing which one a given week calls for is mostly about paying attention to what's actually dirty rather than running the full process on a schedule regardless of need.
Cleaning Air Fryer Toaster Oven Combos
Many newer toaster ovens double as air fryers, which adds a removable fry basket or air fry tray into the mix. These baskets tend to collect grease in their mesh or perforated sections more aggressively than a flat tray would, since hot air circulation pushes oil into every gap. Soaking the basket separately, for longer than you'd soak a standard tray, usually fifteen to thirty minutes in hot, soapy water, makes a real difference. A soft-bristled brush, rather than a sponge, gets into the mesh pattern far more effectively. Everything else about the cleaning process stays the same, the basket is simply an extra component to add to the soak-and-scrub rotation in Step 1 and Step 6.
Step-by-Step: How to Clean a Toaster Oven
Step 1: Remove and Soak the Crumb Tray, Racks, and Drip Pan
Start by pulling out every removable piece, the crumb tray, wire racks, and drip pan or sheet tray, and set them in the sink with warm water and a squeeze of dish soap. If it's been a while since the last cleaning, let them soak for fifteen to twenty minutes. This step alone solves most of the "how do I clean the toaster oven tray" frustration, since soaking loosens baked-on grease enough that it wipes away instead of needing to be scraped off dry.
Step 2: Clear Loose Crumbs and Debris from the Interior
With the trays out, turn the toaster oven on its side or gently invert it over a trash can (check your manual first, some models advise against this) and shake or brush out loose crumbs. A dry pastry brush or an old toothbrush works well for getting into corners. This is also the easiest way to remove burnt crumbs from a toaster oven before they get reactivated by heat next time you use it.
Step 3: Clean the Interior Walls and Floor
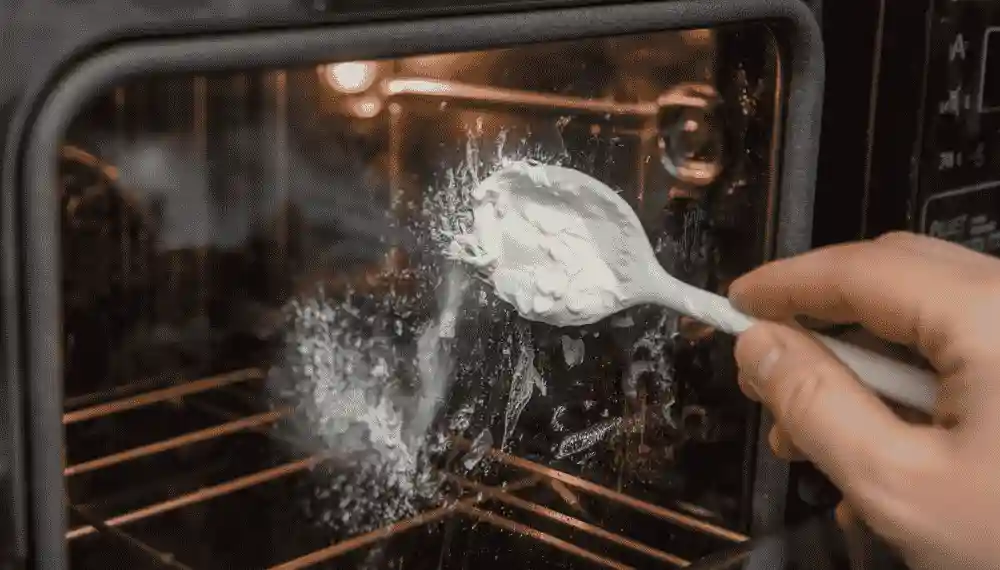
Dampen a soft sponge or cloth with warm water and a small amount of dish soap, and wipe down the interior walls and floor. For light, everyday grime, this is usually enough. For baked-on spots, this is where baking soda earns its reputation as the best way to clean grease off a toaster oven interior without scratching anything: mix baking soda with a small amount of water until it forms a thick paste, spread it over the greasy or stained areas, and let it sit for twenty to thirty minutes. The paste should lift the residue enough that a damp cloth wipes it clean afterward, sometimes with a little gentle scrubbing from the soft side of a sponge.
Step 4: Tackle the Glass Door, Inside and Out
The glass door tends to be the most visibly frustrating part of the whole appliance, partly because grease splatter shows up so clearly on glass, and partly because people are often too cautious or too aggressive with it. For how to clean a toaster oven glass door without leaving scratches, the same baking soda paste used on the interior works well here too, applied directly to the inside of the glass and left to sit for ten to fifteen minutes before wiping. For lighter haze or fingerprints, a one-to-one mix of white vinegar and water in a spray bottle, wiped with a lint-free cloth, cuts through residue without leaving streaks. Avoid spraying liquid cleaners directly onto the door if your model has any exposed seams near the heating element, spray onto the cloth instead and wipe from there.
Step 5: What to Do (and Not Do) With the Heating Element
This is the step where a surprising amount of bad advice circulates, and it's worth slowing down on. Several popular cleaning guides recommend wiping the heating element with a damp cloth or even applying baking soda to it. In practice, this isn't the safest approach. Toaster oven heating elements, particularly the thin metal or quartz coils found in most compact models, are fragile and can warp, crack, or break if any pressure is applied to them, even gentle wiping pressure from a cloth.
The more reliable approach is to leave the heating element alone entirely. Any food or grease that drips directly onto it during cooking will burn off on its own the next time the oven heats up, it's designed to handle that. If there's a buildup that concerns you, the safest move is a very light, dry brush pass with no liquid and no pressure, never a scrub. If you're ever unsure, your owner's manual will specify whether your particular model's element can tolerate any contact at all, and it's worth checking before assuming.
Step 6: Scrub the Crumb Tray, Racks, and Drip Pan
Head back to the sink. After soaking, most grime should wipe off with a sponge. For stubborn, caked-on spots, the same baking soda paste used earlier works here too, sometimes with a splash of vinegar added directly to the paste for extra cutting power, since the two react together to help lift stuck-on residue more effectively than either one alone. Rinse thoroughly and let everything air dry completely before reassembling, any leftover moisture on a tray that goes back into a hot appliance can cause uneven cooking or steam.
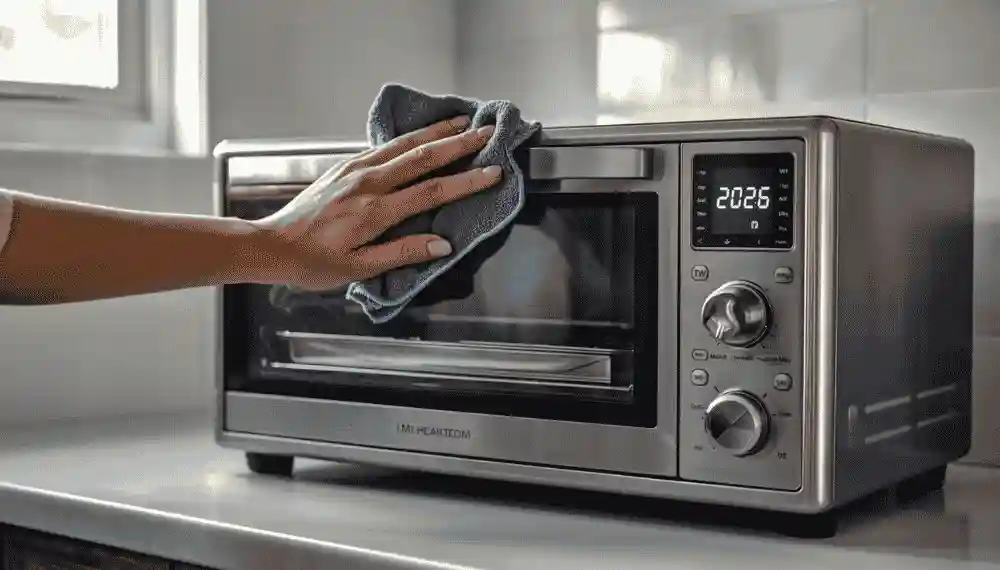
Step 7: Wipe Down the Exterior
The outside of a toaster oven collects a surprising amount of grime simply from sitting near the stove or from hands touching the dials and door handle. A damp, soapy cloth handles most of this. For sticky, baked-on residue near the vents (a common spot, since heat escaping from there carries grease with it), a slightly more abrasive but still safe option like a melamine sponge can help, used gently and without excessive pressure on painted or coated finishes.
Step 8: Dry Completely and Reassemble
Before plugging the unit back in, make sure everything, the interior, the trays, the racks, and the door, is fully dry. Leaving the door open for fifteen to twenty minutes after wiping is usually enough. Any trapped moisture near the heating element is a much bigger concern than any leftover smudge, so don't rush this part.
How Often Should You Clean a Toaster Oven?
For most households, a light wipe-down once a week is enough to keep grease and crumbs from building up into something harder to deal with. If you use your toaster oven daily or for greasy foods like bacon, sausage, or anything with a marinade, weekly is closer to a minimum than a guideline. A deeper clean, the kind involving the baking soda paste step, is usually only necessary every few weeks unless you're cooking particularly messy meals often. The honest answer is that cadence matters less than consistency, a toaster oven that gets a quick crumb-clearing after every few uses rarely needs an intense deep clean at all.
Material Matters: Cleaning Differs by Interior Type
Not every toaster oven interior is built the same way, and the cleaning approach should shift slightly depending on what you're working with.
Stainless steel interiors tolerate baking soda paste and mild abrasives reasonably well, but can show water spots or streaking if not dried thoroughly.
Enamel-coated interiors are more prone to scratching from anything abrasive, stick to soft sponges and avoid melamine erasers on enamel unless the stain is very light.
Nonstick-coated interiors are the most delicate of the three. Avoid anything abrasive entirely, including baking soda paste left on too long, and stick to soft cloths with mild soap to avoid wearing down the coating over time, since a damaged nonstick surface can flake into food.
If you're not sure what your interior is made of, your owner's manual will specify it, and it's worth a quick check before assuming a method that worked on a previous toaster oven will work the same way on this one.
Troubleshooting Common Toaster Oven Problems
Why does my toaster oven smoke when I turn it on? This is almost always residue burning off, either crumbs that fell during the last use or a grease film that's accumulated over time. If it happens consistently with a freshly cleaned oven, check for food debris that may have settled into the back corners or underneath the heating element, areas that are easy to miss during a quick wipe-down.
How do I get rid of a burning smell in my toaster oven? Run the empty oven on a low heat setting for ten to fifteen minutes with the kitchen vent on or a window open, this often burns off lingering odor from residue you can't fully reach. If the smell persists after a thorough cleaning, double-check that no packaging, plastic, or paper residue was left inside accidentally, which can produce a stronger and more acrid smell than typical food grease.
Why does the glass door look hazy even after cleaning? Hazy glass is usually a thin grease film rather than a deep stain, and it often needs the vinegar-water solution rather than baking soda to fully clear, since grease haze responds better to a degreasing rinse than an abrasive paste.
Why does the door feel sticky around the edges even after wiping it down? This is usually grease that's worked its way into the seal or hinge area, spots a flat sponge tends to skip over entirely. A cotton swab or an old toothbrush dipped in warm soapy water reaches these narrow edges far better, and it's worth doing this every few deep cleans even if the rest of the door looks fine.
Habits That Keep It Cleaner Longer
A few small habits make a bigger difference than any single deep clean. Wiping out loose crumbs after every few uses prevents them from baking into a permanent stain. Using a sheet of foil or a reusable liner on the tray (check your manual first, since some manufacturers advise against foil due to heat reflection issues) can reduce direct contact with grease. And resisting the urge to use the toaster oven as extra counter storage means dust and kitchen grease have less chance to settle on the exterior between uses.
Frequently Asked Questions
How often should you clean a toaster oven? A light cleaning once a week is enough for most households, with a deeper clean every few weeks depending on how often it's used and what kinds of food are cooked in it.
Can you use oven cleaner on a toaster oven? It's best to avoid traditional spray-on oven cleaners made for full-size ovens. They're formulated for larger, more ventilated spaces and can be too harsh for a toaster oven's compact interior and coatings.
How do you clean a toaster oven with baking soda? Mix baking soda with a small amount of water to form a thick paste, apply it to greasy or stained areas (avoiding the heating element), let it sit for twenty to thirty minutes, then wipe away with a damp cloth.
Why does my toaster oven smoke when I turn it on? It's typically leftover grease or crumbs burning off. If it happens often, check corners and the area beneath the heating element for missed debris.
Can I use vinegar and baking soda together to clean a toaster oven? Yes, the combination is effective because the chemical reaction between them helps lift grease and stains more effectively than either ingredient alone, particularly on stubborn, baked-on spots.
Is it safe to clean the heating element of a toaster oven? It's safer to leave it alone. Heating elements are fragile and can be damaged by pressure from wiping or scrubbing. Residue on them typically burns off on its own during normal use.
Final Thoughts
Cleaning a toaster oven properly isn't complicated, but it does reward a little patience and a willingness to let baking soda do the work instead of a scrub brush. Keep cleaners away from the heating element, stick to soft tools on the glass and interior walls, and stay consistent with light wipe-downs between deep cleans, and the appliance will keep performing the way it did on day one, without the smoke, smell, or scratched-up interior that comes from rushing the process.